
You can install the FileCap Office 365 Web plugin with the manifest file which you can download from the FileCap Office 365 settings page.
Installation
Note: Before installation of the FileCap Office365 Web plugin please make sure you checked the plugin requirements.
Install through the Exchange Admin Center
Follow the next steps to install the FileCap Office365 Web plugin from the Exchange Admin Center:
- Login to the Microsoft Admin Center – Add-ins
- Now click “Deploy Add-In”
- Select “Deploy a custom add-in”


- Choose “I have the manifest file (.xml) on this device” and select the downloaded manifest.xml

- Choose “Upload manifest file (.xml) from device”

- On the next page assign the users that should be able to use FileCap and the deployment method

- Click on “Deploy” to finish deployment
Check the installation in OWA
Follow the next steps to check if the installation of the plugin is successful.
Check the plugin in OWA
- Login to the mailbox
- Click “New message”
- Click at the FileCap icon in the bottom-right.
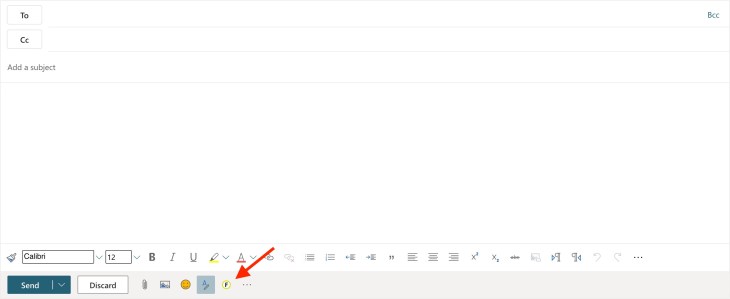
- The FileCap Plugin should open at the right side.
Is the plugin not visible for the user?
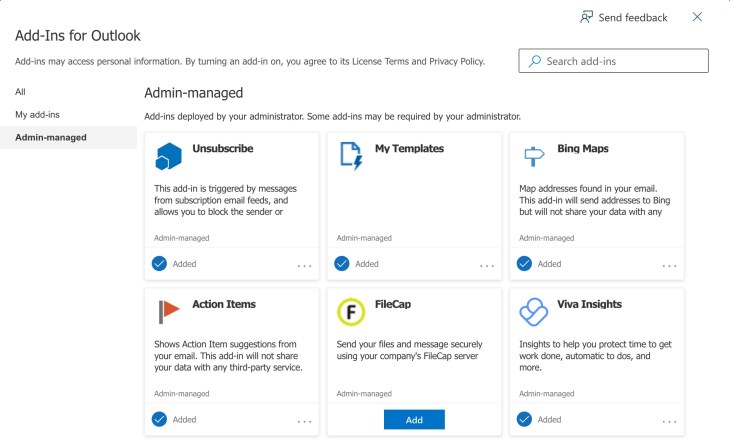
- Click “New message”
- Click the three dots on the add-in ribbon and click “Get Add-ins”

- Go to “Admin-managed”
- Click “Add” to enable the FileCap plugin
- Click at the FileCap icon in the bottom-right
- The FileCap Plugin should open at the right side
If the FileCap plugin is not installed correctly please check the previous steps on this page.

You must be logged in to post a comment.