
If your FileCap server does not have enough disk space left and you want to expand the disk this can be done by following these steps.
Important: Please be aware that making changes to hard disk size/partitions can cause data loss if something goes wrong. Make sure you have a full backup of the FileCap Server.
Determine the correct procedure
- Login to the FileCap server with SSH
- In the console menu choose option 6. “Admin prompt”.
- Switch to the root user using the command:
sudo su
- Determine if the FileCap server is using LVM partitioning or not
To do this enter the command: ‘fdisk -l’ and review the result.
- If you see “Linux LVM” (like in the image above) the FileCap server is using LVM and you can continue to “Steps if the FileCap Server is using LVM“.
- If you don’t see “Linux LVM” anywhere the FileCap server is probably not using LVM, please continue to “Steps if the FileCap server is using something else”.
Steps if the FileCap server is using LVM
- Backup the whole FileCap server, because we are changing partitions something can go wrong, so a backup is necessary.
- Expand the virtual disk (in VMware/Hyper-V) to the desired size. (For advised hard disk sizing see the chapter “System requirements“)
- Login to the FileCap server with SSH
- In the console menu choose option 3. “Admin prompt”
3
- Switch to the root user using the command:
sudo su
- Enter cfdisk using the following command
cfdisk /dev/sda
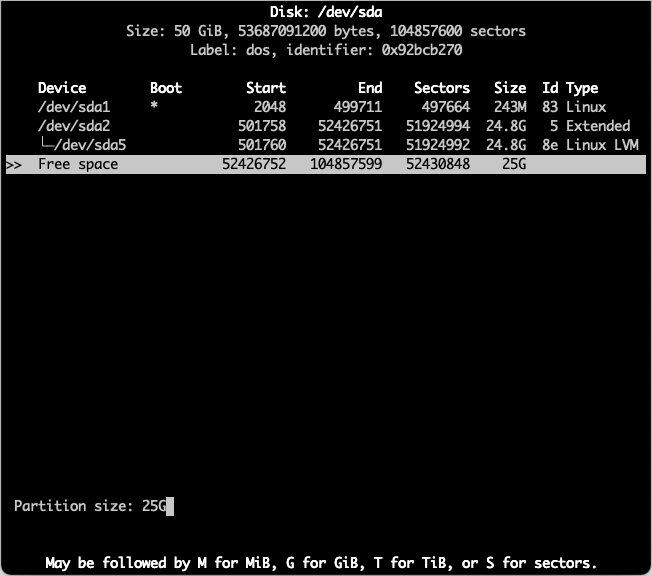
- Using the arrow keys navigate to Free space and create a New partition by pressing enter.

- Accept the default partition size by pressing enter.
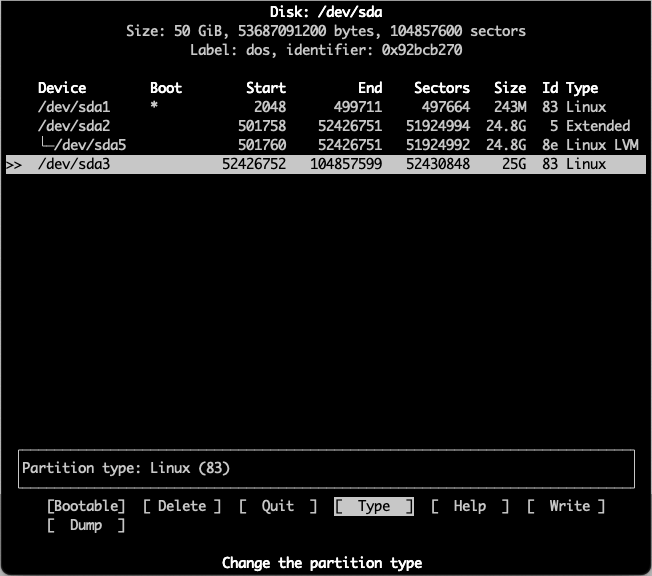
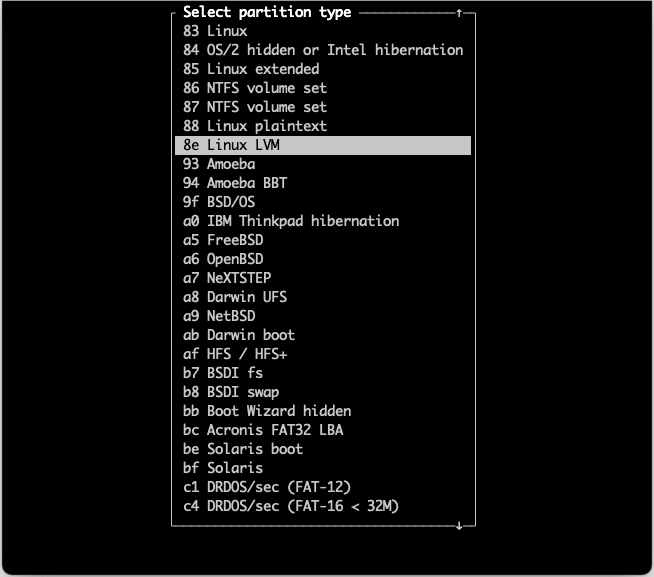
- After creating the new partition, change the Type to Linux LVM.
- After changing the partition type, Write changes to disk.
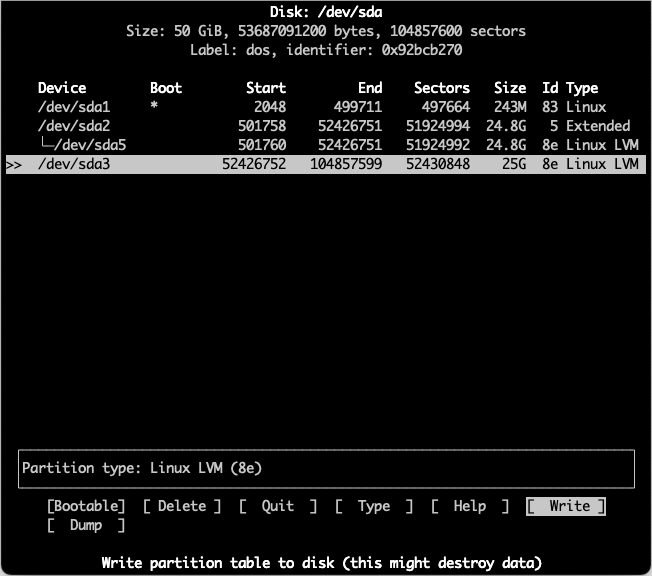
- Quit cfdisk.

- Rescan the partition table by running the following command, remember the highlighted partition number from your own output (In the example it is #3, yours may differ.):
partx -v -a /dev/sda

- Afterwards, you can see the newly created partition with fdisk by entering:
fdisk -l /dev/sda

- Create a physical volume with the following command, replace sda partition number with your own from step 12:
pvcreate /dev/sda3

- Find out what your Volume Group is called with the following command:
vgdisplay
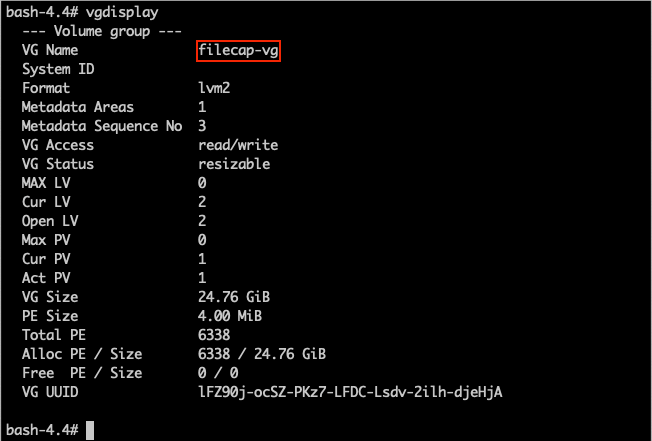
- Extend the volume group by adding the physical volume with the following command, replace sda partition number and the Volume Group name with your own from the output of steps 12 and 15:
vgextend filecap-vg /dev/sda3

- With the following command we can see our newly added physical volume and the usable space:
pvscan

- Use the following command to find your root Logical Volume path:
lvdisplay
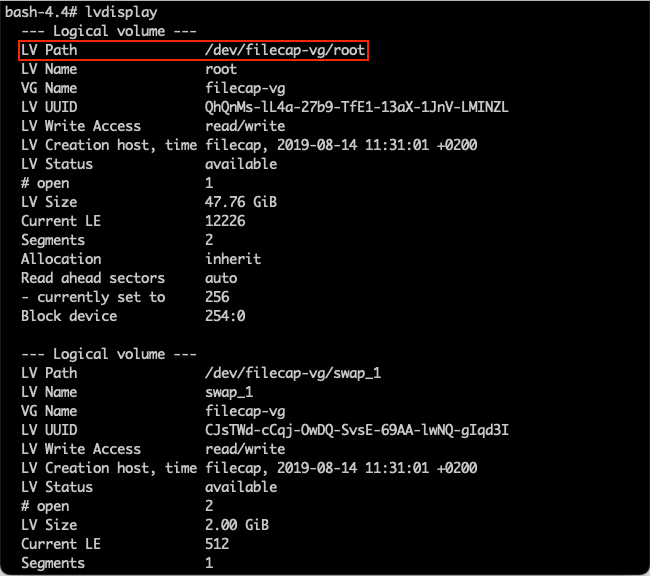
- Use the following command to extend the Logical Volume, replace sda partition number and the Logical Volume path with your own from the output of steps 12 and 18:
lvextend /dev/filecap-vg/root /dev/sda3

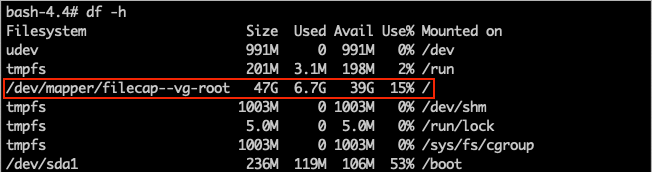
- Now resize the root file system to use the newly available space, to do this use the following command, replace the Logical Volume path with yours from step 18:
resize2fs /dev/filecap-vg/root

- The root file system has now been resized, this can be validated with the following command:
df -h
Steps if the FileCap server is using something else
- Backup the whole FileCap server, because we are changing partitions something can go wrong, so a backup is necessary.
- Download the latest stable version of the partition manager GParted ISO file from https://gparted.org/download.php
- Shutdown the FileCap server
- Expand the virtual disk (in VMware/Hyper-V) to the desired size. (For advised hard disk sizing see the chapter “System requirements“)
- Connect the GParted ISO file to the FileCap virtual machine.
- Boot the FileCap server from ISO file.

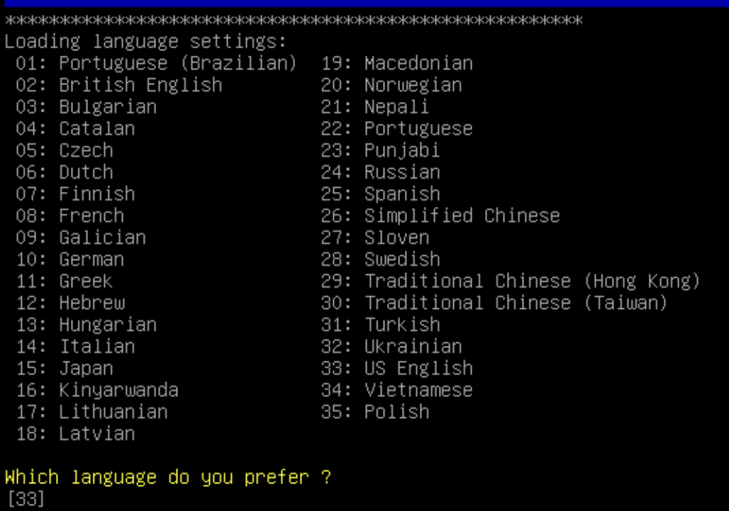
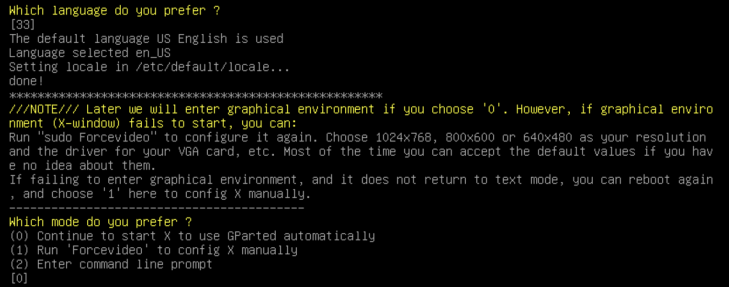
- Select “Don’t touch keymap”

- Keep the default language US English, option “33” press enter.
- Keep the default mode, option “0” press enter.
- Now GParted would start automatically and you see the next screen.
Note: This screen can be different on every server depending on hard disk size and previous partitioning.
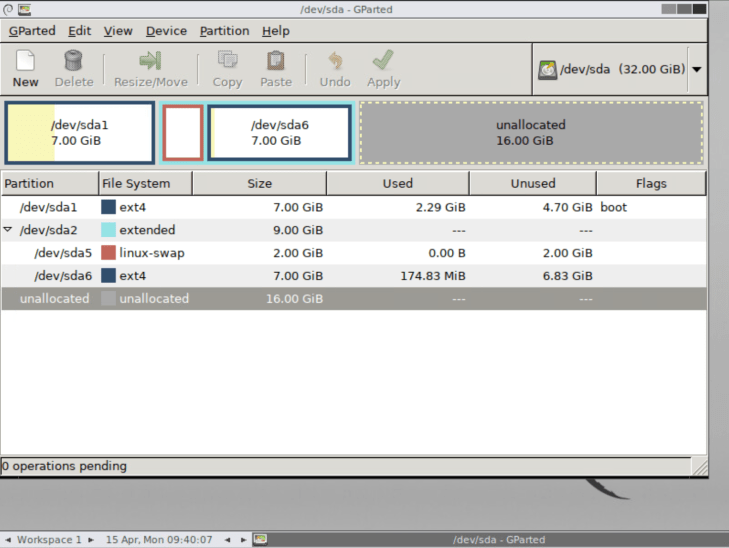
- First we need to extend the Extended partition (/dev/sda2 color light blue)
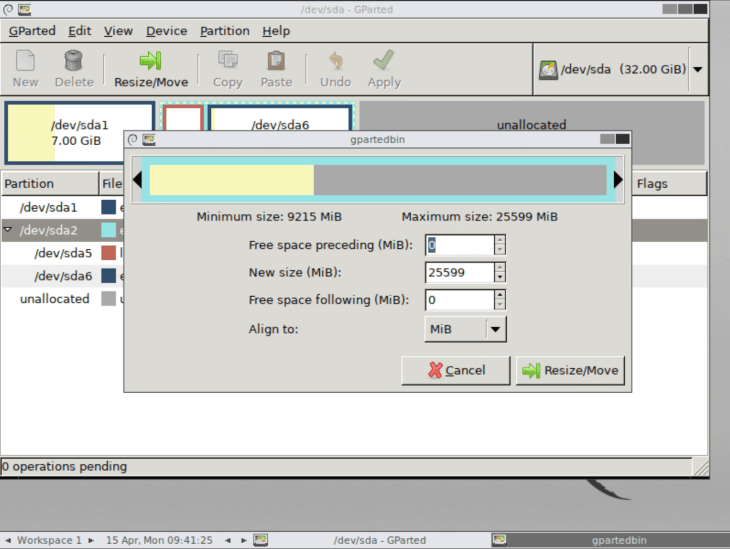
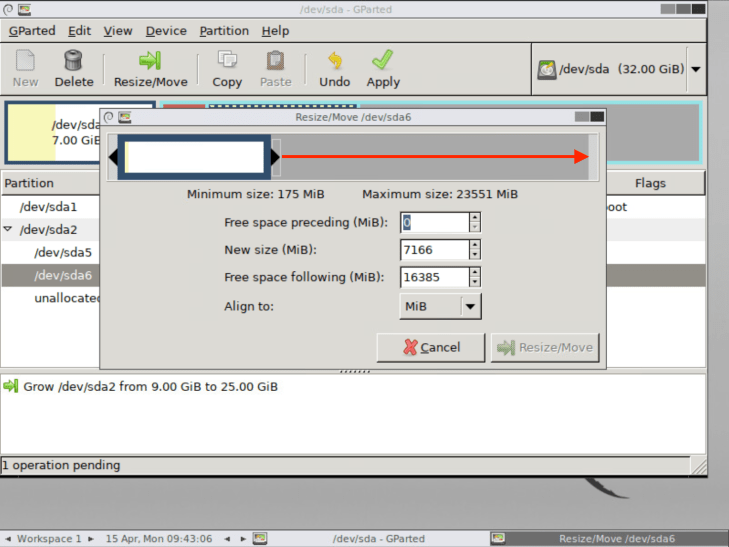
Click on the rule /dev/sda2 and click the “Resize/Move” button. - Move the bar to the right, like this:

- If you moved the bar you see this, and you can click the “Resize/Move” button:
- When step 13 is completed you get back to the overview and the /dev/sda2 partition is wider.
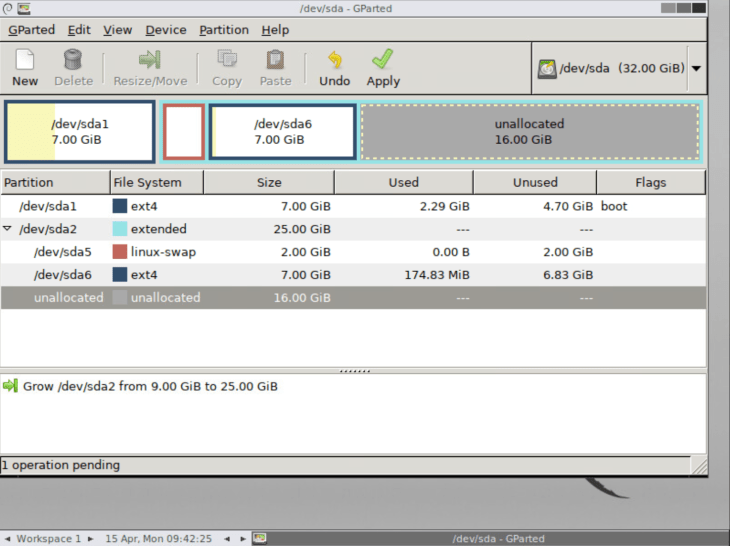
- Now we need to extend the /dev/sda6 ext4 partition (/dev/sda6 color dark blue)
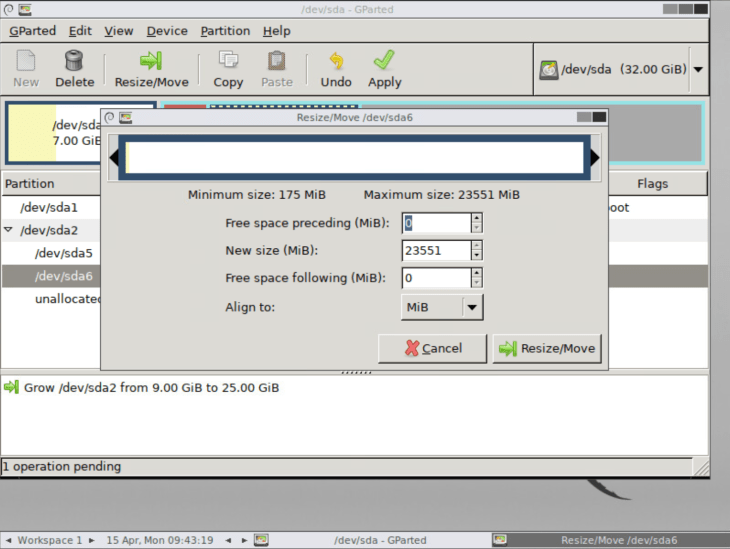
Click on the rule /dev/sda6 and click the “Resize/Move” button. - Move the bar to the right, like this:
- If you moved the bar you see this, and you can click the “Resize/Move” button:
- When step 17 is completed you get back to the overview and the /dev/sda6 partition is wider.

- Now you can click the “Apply” button, next you see the following message where you also can click on “Apply” to change the partition.
Note: Please make sure you have a full backup of the FileCap server before applying.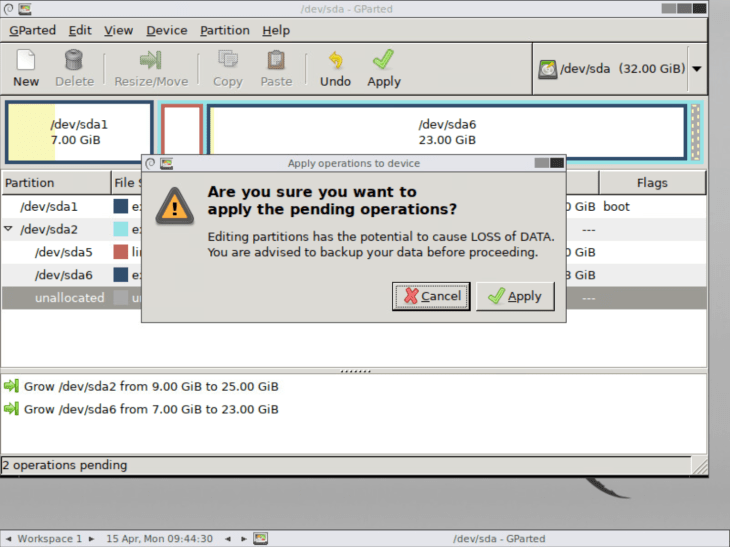
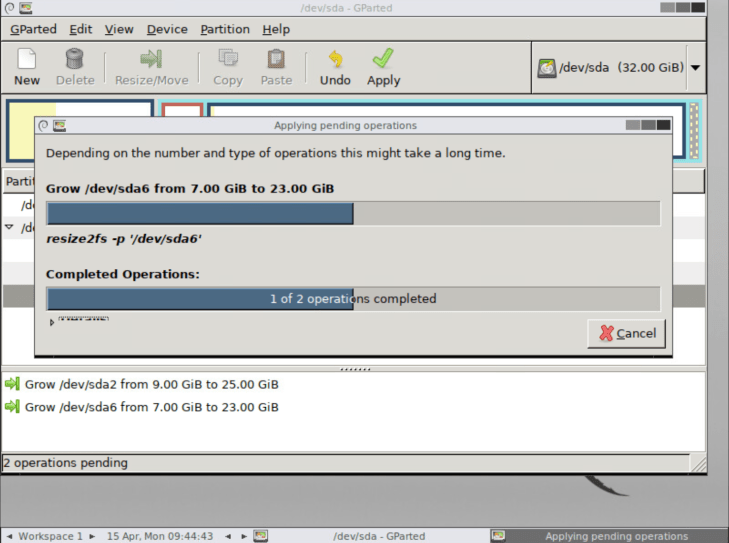
- Wait for all operations to be completed
- The partitions are now changed and the free space is added. Gparted can now be closed

- Now you can shutdown the server by clicking “Exit” and after that choose “Shutdown”.

- Disconnect the GParted ISO file from the FileCap virtual machine.
- Start the FileCap server, the disk is now expanded.
Check disk space
- Login to the FileCap server with SSH
- in the console menu choose option 3. “Admin prompt”
- Enter the command ‘df -h’ to check used/available disk space.


You must be logged in to post a comment.